 In my previous tutorial I’ve shown a great, fast way to paint truckloads of Skaven Clan rats and still have them look great. I recently started adding some Plague Monks to my army, so I wanted to show you my paint scheme. Keep reading if you want a fast way to paint good looking Plague Monks!
The goal
Like the Skaven Clanrats ‘batch paint’ workflow, I wanted to use a similar simple approach for the Plague Monks: get them looking great and tabletop ready in 5 fast steps.
The only difference is that we will spend a little bit more time on detailing the Plague Monks than we did on the Clan Rats. Since the Plague Monks are more ‘elite’ you don’t need to paint as many models you can afford to spend a little bit more time on them and still finish a lot of them fast. So note that the models in this guide are not aimed to be painted up to my (or your) highest standards, the goal is to finish good looking models fast so you can start gaming with them.
Colors & Painting Steps
When you want to speed up your painting you start by limiting your colors. The less different colors and steps of painting, the faster you can go. It sounds like an open door but its a pitfall many fall into including myself. Its just so tempting to keep adding more detail and variations to your mini’s. Limit yourself and be thankful later 🙂
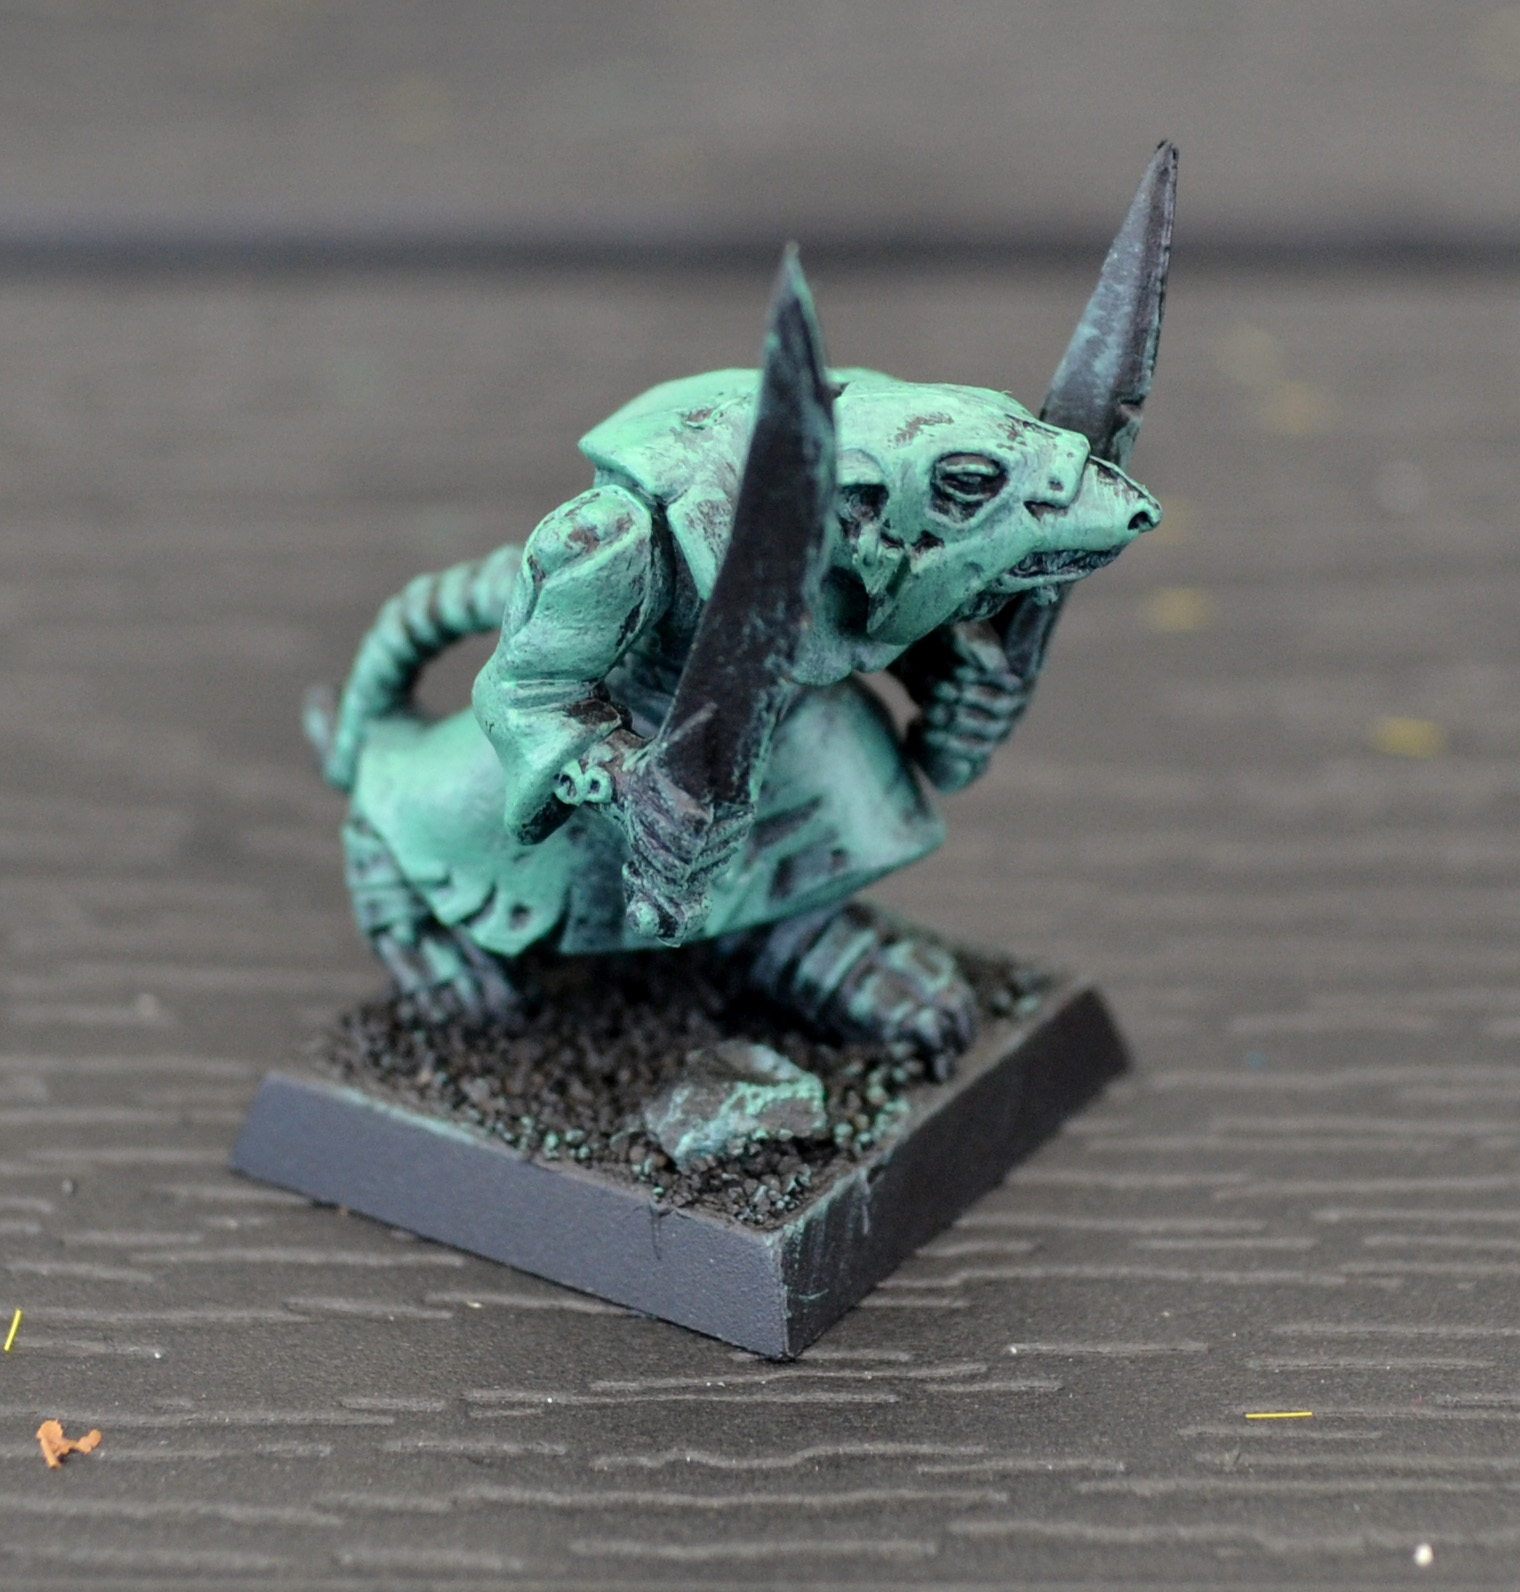
For the Plague Monks I wanted to have a really old, moldy color for the robes, and different from the standard Games Workshop paint scheme. I decided on green robes. In addition I chose to make the rat bodies gray to suggest that they are older forces within the army.
 90% of the Plague Monk models are the clothing, so I focussed on creating an easy, good looking workflow for that. The faces, and small parts of the bodies were of less concern to me. I ended up settling on the following 3 colors for the base of the paint job:
Main Colors:
- Sybarite Green
- Straken Green
- Ushabti Bone
Remaining colors used are:
- Dryad Bark and Graveyard Earth for bases
- Codex Gray (rat body, feet, face, tail)
- Agrax Earthshade wash (for rat body, feet, face, tail and metal weapons)
- Space Wolves Gray to highlight rat body, feet, face, tail
- a Metal color to drybrush swords
Note 1: Please do everything in the exact order I described. Some things may seem not logical but it is so that you don’t have to go back later on with a color you already used earlier. It is small optimizations like these that will save you a lot of time. Efficiency baby!
Note 2: I am an ass. Some photo’s don’t show the sequenced steps 100% correctly and I forgot to take a photo of painting the weapons and adding the wash. I did not have the opportunity to take new pictures in the same lighting conditions so I left it this way. If you follow the instructions in the text you should end up having the same end results.
Step 1: Paint Base & Clothing
After having your model assembled, based and primed black, start by over brushing the base with Dryad Bark. When dried, overbrush again lightly with Graveyard Earth for a highlight. If you use different colors for your bases simply substitute my colors with yours. A tip here is to also touch the Plague Monk’s feet with the base colors. Some of them have some bandages around their feet, and because I don’t want to touch on these individually (takes too much time) we touch them with the brown of the base, making it look like their all ‘muddied up’. Cheap trick ftw!
 Next overbrush the entire model (except the base) with Sybarite Green. Because this is a layer paint, it does not give a very good coverage on the black primer. In this case this is exactly what you want, as you’ll find out in a minute. Cover the entire model quickly and repeat this for about 5 Plague Monks. By the time you are done they’ve all dried and look very crappy. Overbrush again with Sybarite Green, now the second time it will start to give a good coverage, acting as a “highlight” color over your first see-through layer. Boom, there you go: with just 1 color you already have some depth and detail going.
What you want to do here, is touch on primarily the raised areas with your second coat, not touching the recesses or insides of arms, undersides of body etcetera. By leaving enough of the bad covering first layer visible, you create a nice highlight with the second pass. I found that starting the second pass on the head and neck/cape worked best, because you loose the most paint there, going more subtle on the other parts. You will find out after a few models what looks good and then you can step-repeat it for more of your Plague Monks.
If you accidentally touch the rat body, face and even some parts of your base: Don’t worry. You will go back in a next step to finish the rat bodies neatly, and the bases don’t suffer from having a hint of green here and there. Remember you want to go quick in these steps.
Finish off this step by adding Straken Green to parts of the clothing. This will give the clothing a fantastic layered depth of colors, with a cold hue in the recesses and a more full rich color on the raised areas.

You will notice the clothing takes the majority of the time. This is ok because on these models its about 90% of the miniature. Do the above for about 5 to 10 models before moving on.
Step 2: Paint the Body parts & Weapons
The next step is again a quick and easy one. Paint the rat head, body, arms, hands, feet and tail in a flat coat of Codex Gray (or a similar gray). This will boring yes, which we will fix in the next step. Don’t forget to paint the ears and eyelids that poke through the hoodies gray too. They really make the model look good later on.
Also during this step drybrush the black primed weapons with a metal color of choice. This does not show in the pictures until the final photo. Sorry 🙂
Step 3: Highlight the Clothing & Paint nails/skulls
 So far your model will not look super good, as is usually the case when you are still working on it. I personally find models look very bad right until the final step where I finish up and clean the base. Until that time it is best to not judge your work yet. Have faith 🙂
That said your next step is to add the final highlight on the clothing. Use 100% Ushabti Bone, thin it down a little bit so it flows easily from a fine detail brush. Now edge highlight the clothing and focus on the edges of the hoodies, sleeves and robes. This step will take some time, but it really sets your models apart in quality. So in my opinion this is really worth it.
Also while you are at it. use the Ushabti Bone to quickly paint the teeth & nails on the feet. Some models also have some skulls and Skaven triangle thingies, you can paint these with the bone color as well, wish all will receive a brown wash in the next step. Note that in the pictures I forgot the teeth.
Step 4: Wash Body parts & Weapons

You have now finished the main paint work on 5 to 10 models. Wash the swords and body parts with Agrax Earthshade, or a similar “Devlan Mud-ish” wash. Set the models aside to dry, which unfortunately taking some time with washes. If you have no patience like me, this is the moment where you pull out your wife’s hairdryer 🙂 The reason I wash the weapons with brown also is to make them look older and crappy, which fits better than shiny new weapons on a Skaven Army.
Step 5: Highlight Body parts & Finish base
The last step to finish your model is highlighting the gray body parts. Because of the brown wash your gray body parts will have dried darker than the original Codex Gray coat. This is great because now you can use Codex Gray again to ‘highlight’. Go ahead and add some highlights to the snout, tail, hands, eyelids and ears with Codex Gray. Finally do it again using a 50/50 mix of Codex Gray and Space Wolves gray to touch the snout, hands, tail, eyelids and ears again. This final highlight should really make your models ‘pop’. I even used 100% Space Wolves Gray for an even bigger contrast, this is taste so use what you like best.
Finish of the model by glueing static grass or flock onto the base how you normally do for your army and paint the edge of the base in a color of choice. And you are done!
Conclusion

Using these steps you should be able to create some awesome looking Plague Monks in a short time. They do take a little bit longer than the Clan Rats batch paint, but offset by the smaller amount of models needed they still finish fast.
What do you think? Please leave a comment below or post some of your own results if you’ve used this tutorial!

These look outstanding! Any tips on a good warp stone color? Or perhaps a Screaming Bell or Furnace scheme?
LikeLike
thanks!
I can do a tutorial on warpstone colors, sounds like a fun thing to do!
You can see my furnace in the gallery, if you want to have a look
LikeLike